Posted on Leave a comment

Version 3.3.0 now adds support for PHP 8

The latest release of the LXD dashboard, version 3.3.0 now adds support for PHP version 8. This new release has been tested with the upcoming release of Ubuntu 22.04. It is also backwards compatible with PHP version 7, which is found on the previous LTS release.

In addition to the changes for PHP 8, improved handling of the external port in remote hosts, a bug fix for curl based variables, and also reporting “N/A” when listing storage pools without a data size.

The docker setup for version 3.3.0 will continue to use Ubuntu 20.04 as its base setup.

Posted on 11 Comments

Installing the LXD dashboard on Ubuntu 22.04

This how-to guide will take you through the installation steps to download and setup the LXD dashboard on Ubuntu 22.04. This guide will use Ubuntu through an LXD container, but can be also installed through a traditional installation.

Assuming that your system already has LXD installed and configured, start by launching a new instance using the Ubuntu 22.04 image. To launch the new instance and name it lxd-dashboard use the following command:

lxc launch images:ubuntu/22.04 lxd-dashboard

This will create a base container to use to install the LXD dashboard. Once the command finishes the container should be running. Now it is time to connect into the container and setup the software. Use the following command to obtain a bash shell connection to the instance, use the exit command at anytime to leave the shell:

lxc exec lxd-dashboard /bin/bash

The following commands will now be run inside the lxd-dashboard container. Verify that the terminal prompt reads root@lxd-dashboard:~# before installing any software. The LXD dashboard uses Nginx and PHP for the webserver platform and SQLite as a database. To install these packages use the following command:

apt update && apt install wget nginx php-fpm php-curl sqlite3 php-sqlite3 -y 

Using wget, the source code for the LXD dashboard can be downloaded from the GitHub repository. For this guide the v3.7.0 release will be used. Check for newer versions on the GitHub page and replace the version number with the latest. If your container is having trouble reaching out to the internet, see https://discuss.linuxcontainers.org/t/containers-do-not-have-outgoing-internet-access/10844/4. To download and extract the source code use the following two commands:

wget https://github.com/lxdware/lxd-dashboard/archive/v3.7.0.tar.gz
tar -xzf v3.7.0.tar.gz

A few web server files will need to moved into place for the web pages as well as the NGINX configuration. To copy these files use the following commands, making sure to change the version number to what was downloaded:

cp -a lxd-dashboard-3.7.0/default /etc/nginx/sites-available/
cp -a lxd-dashboard-3.7.0/lxd-dashboard /var/www/html/

The default site configuration file (/etc/nginx/sites-enabled/default) in Nginx has now been replaced. In Ubuntu this file should be linked from the sites-available directory. The version of php-fpm changes over time and the file path listed in the default configuration will need to be updated for your environment. Ubuntu 20.04 used version 7.4, but Ubuntu 22.04 now uses version 8.1. Edit the file using a text editor (nano, vi, etc) and comment out the path to version 7.4 and uncomment the path for version 8.1.

server {
	listen 80 default_server;
	listen [::]:80 default_server;
	root /var/www/html/lxd-dashboard;
	index index.php index.html;
	server_name _;

	location / {
		try_files $uri $uri/ =404;
	}
	
	location ~ \.php$ {
        #include snippets/fastcgi-php.conf;
        #fastcgi_pass unix:/var/run/php/php7.4-fpm.sock;
	#fastcgi_pass unix:/run/php/php7.4-fpm.sock;
	fastcgi_pass unix:/run/php/php8.1-fpm.sock;
    	fastcgi_param SCRIPT_FILENAME $document_root$fastcgi_script_name;
    	include fastcgi_params;
    	include snippets/fastcgi-php.conf;
     }
}

There are three main directories that LXDWARE uses to store persistent information for the application. You will need to create these directories and then assign appropriate ownership to the web server. To create the directories use the following commands:

mkdir -p /var/lxdware/data/sqlite
mkdir -p /var/lxdware/data/lxd
mkdir -p /var/lxdware/backups

The /var/www/html/lxd-dashboard/ directory, the /var/lxdware/ directory, and the contents within them all need to be owned by the web server user. To set the proper permissions run the following commands:

chown -R www-data:www-data /var/lxdware/
chown -R www-data:www-data /var/www/html

The NGINX web server will need to be restarted to apply the web server configuration changes made above. To restart the web server run the following command:

systemctl restart nginx

Congratulations! The LXD dashboard is now setup and ready to use. Exit from the bash terminal and return to your LXD host server by using the command:

exit

Open a web browser and access the LXD dashboard by entering in the IP address of the instance. Use the lxc list command to view a list of the containers and their IP addresses on your LXD server.

Optional Port Forward Configuration for LXD containers

Port forwarding can be used to make the lxd-dashboard instance accessible to others computers outside of the server. The lxd-dashboard listens on port 80 for web traffic. In this how-to guide the host’s port 80 will be forwarded to the instance’s port 80. For more information on port forwarding view the how-to guide Forwarding host ports to LXD instances.

To create a new profile named proxy-port-80 use the following command:

lxc profile create proxy-port-80

To configure the profile to forward the port 80 from the host server to port 80 on the instance, use the following command:

lxc profile device add proxy-port-80 hostport80 proxy connect="tcp:127.0.0.1:8080" listen="tcp:0.0.0.0:80"

To apply the newly created profile to the lxd-dashboard instance and begin forwarding port 80 traffic to your instance run the following command:

lxc profile add lxd-dashboard proxy-port-80

Open a web browser and access the LXD dashboard by entering in the IP address of the host server.

Posted on 2 Comments

Simple LXD reverse proxy using HAProxy

Launching the container

This how-to guide will take you through the steps to setup a reverse proxy on your system by using a LXD container to run HAProxy and then configure it pass networking traffic to internal containers. This guide will assume that your system is already configured as an LXD server.

Before setting up the reverse proxy, run the following command to get a list of IP addresses for your containers, noting the address of the instances to forward traffic to:

$ lxc list

Start by launching a new instance using the Ubuntu 20.04 image. To launch the new instance and name it haproxy use the following command:

$ lxc launch ubuntu:20.04 haproxy

This will create a base container where we will install HAProxy. Once the command finishes the container should be running. We will need to setup port forwarding (proxy port) for the TCP/UDP ports we want HAProxy to handle. The plan is to have port 80 (http) and 443 (https) forwarded to the haproxy container and from there it will redirect traffic to the appropriate internal instances. To forward the host LXD server ports to the haproxy instance, we can either edit the haproxy container configuration directly or create a profile for the port forwarding and then attached it to the container. In this tutorial I will edit the container’s configuration directly. See https://lxdware.com/forwarding-host-ports-to-lxd-instances/(opens in a new tab) for instructions on creating profiles as an option.

Use the following commands to edit the configuration of the haproxy container and forward both ports 80 and 443 from the host LXD server to the container:

$ lxc config device add haproxy hostport80 proxy listen=tcp:0.0.0.0:80 connect=tcp:127.0.0.1:80
$ lxc config device add haproxy hostport443 proxy listen=tcp:0.0.0.0:443 connect=tcp:127.0.0.1:443

Now it is time to connect into the container and setup the software. Use the following command to obtain a bash shell connection to the instance, use the exit command at anytime to leave the shell:

$ lxc exec haproxy /bin/bash

Installing HAProxy

The following commands will now be run inside the haproxy container. Use the following command to install the HAProxy package:

$ apt update && apt install haproxy -y 

Setting up the proxy config

With HAProxy installed, we will need to add a frontend and backend that listens for ports 80 and 443. Since port 443 will listen for encrypted SSL traffic, we need to create a separate frontend handling SSL traffic. Both frontends listen for the destination URL and assign an ACL Host to traffic matching the URL. If the traffic is matched to an ACL host, it is then assigned the appropriate backend to send traffic to. To edit the configuration file use the following command:

$ /etc/haproxy/haproxy.cfg

Append the highlighted code below. In the example two different internal containers are both using port 80 and 443. One is running WordPress and the other Nextcloud. If the correct URL is coming into HAProxy, the traffic is then assigned a backend which define the internal instance to direct traffic to.

global
	log /dev/log	local0
	log /dev/log	local1 notice
	chroot /var/lib/haproxy
	stats socket /run/haproxy/admin.sock mode 660 level admin expose-fd listeners
	stats timeout 30s
	user haproxy
	group haproxy
	daemon

	# Default SSL material locations
	ca-base /etc/ssl/certs
	crt-base /etc/ssl/private

	# See: https://ssl-config.mozilla.org/#server=haproxy&server-version=2.0.3&config=intermediate
        ssl-default-bind-ciphers ECDHE-ECDSA-AES128-GCM-SHA256:ECDHE-RSA-AES128-GCM-SHA256:ECDHE-ECDSA-AES256-GCM-SHA384:ECDHE-RSA-AES256-GCM-SHA384:ECDHE-ECDSA-CHACHA20-POLY1305:ECDHE-RSA-CHACHA20-POLY1305:DHE-RSA-AES128-GCM-SHA256:DHE-RSA-AES256-GCM-SHA384
        ssl-default-bind-ciphersuites TLS_AES_128_GCM_SHA256:TLS_AES_256_GCM_SHA384:TLS_CHACHA20_POLY1305_SHA256
        ssl-default-bind-options ssl-min-ver TLSv1.2 no-tls-tickets

defaults
	log	global
	mode	http
	option	httplog
	option	dontlognull
        timeout connect 5000
        timeout client  50000
        timeout server  50000
	errorfile 400 /etc/haproxy/errors/400.http
	errorfile 403 /etc/haproxy/errors/403.http
	errorfile 408 /etc/haproxy/errors/408.http
	errorfile 500 /etc/haproxy/errors/500.http
	errorfile 502 /etc/haproxy/errors/502.http
	errorfile 503 /etc/haproxy/errors/503.http
	errorfile 504 /etc/haproxy/errors/504.http


frontend localhost80
    bind *:80
    mode tcp

    #Set acl based on domain name
    acl host_nextcloud hdr(host) -i srv2.test.internal
    acl host_wordpress hdr(host) -i srv1.test.internal

    #Set backend for each acl
    use_backend nextcloud_http if host_nextcloud
    use_backend wordpress_http if host_wordpress


frontend localhost443
   bind *:443
   option tcplog
   mode tcp
   acl tls req.ssl_hello_type 1
   tcp-request inspect-delay 5s
   tcp-request content accept if tls

   #Set acl based on the domain name
   acl is_nextcloud req.ssl_sni -i srv2.test.internal
   acl is_wordpress req.ssl_sni -i srv1.test.internal

   #Set backend for each acl
   use_backend nextcloud_https if is_nextcloud
   use_backend wordpress_https if is_wordpress


backend nextcloud_http
   mode tcp
   server ubuntu-nextcloud 10.187.151.36:80 check

backend wordpress_http
   mode tcp
   server ubuntu-wordpress 10.187.151.36:80 check

backend nextcloud_https
   mode tcp
   option ssl-hello-chk
   server ubuntu-nextcloud 10.187.151.36:443 check

backend wordpress_https
   mode tcp
   option ssl-hello-chk
   server ubuntu-wordpress 10.187.151.36:443 check

Starting and Enabling HAProxy

Now that the configuration has been added it is time to restart HAProxy to apply the changes. In addition to restarting HAProxy it is a good idea to enable the service as well, as not all distributions enable it automatically. Run the following commands to restart and enable HAProxy:

$ systemctl restart haproxy
$ systemctl enable haproxy

Congratulations! The container is now setup. Exit from the shell terminal and return to your LXD host server by using the command:

$ exit

Additional thoughts

The backend configuration in example lists only a single instance to forward traffic to for each backend. Additional instances can be defined in the same backend allowing for load balancing if two or more servers are running the same software in a High Availability (HA) setup. HAProxy also has the ability to monitor (check) the health of the backend instance and it can be configured to display a statics web page to show the health of the backend.

Also, frontends can listen to more than one port. Since port 443 uses SSL encryption, a separate frontend was created specifically to handle the SSL traffic. This example forwards SSL traffic directly to an internal instance using TCP mode, where the internal instance handles the SSL certificates. HAProxy can be configured to handle the SSL certificates instead.

Posted on Leave a comment

Simple Nginx Reverse Proxy in LXD

Launching the container

This how-to guide will take you through the steps to setup an Nginx reverse proxy on your system by using an LXD container to run Nginx and configure it to run as a reverse proxy, forwarding traffic to internal containers. This guide will assume that your system is already configured as an LXD server.

Before setting up the reverse proxy, run the following command to get a list of IP addresses for your containers, noting the address of the instances to forward traffic to:

$ lxc list

Start by launching a new instance using the Ubuntu 20.04 image. To launch the new instance and name it nginx-proxy use the following command:

$ lxc launch ubuntu:20.04 nginx-proxy

This will create a base container where we will install Nginx. Once the command finishes the container should be running. We will need to setup port forwarding (proxy port) for the TCP/UDP ports we want Nginx to handle. The plan is to have port 80 and 443 forwarded to the nginx-proxy container and from there it will redirect traffic to the appropriate instances. To forward ports, we can either edit the nginx-proxy container directly or create a profile for the port forwarding and attached it to the container. In this tutorial I will edit the container’s configuration directly. See https://lxdware.com/forwarding-host-ports-to-lxd-instances/(opens in a new tab) for instructions on creating profiles as an option.

Use the following commands to edit the configuration of the nginx-proxy container and forward both ports 80 and 443 from the host LXD server to the container:

$ lxc config device add nginx-proxy hostport80 proxy listen=tcp:0.0.0.0:80 connect=tcp:127.0.0.1:80
$ lxc config device add nginx-proxy hostport443 proxy listen=tcp:0.0.0.0:443 connect=tcp:127.0.0.1:443

Now it is time to connect into the container and setup the software. Use the following command to obtain a bash shell connection to the instance, use the exit command at anytime to leave the shell:

$ lxc exec nginx-proxy /bin/bash

Installing Nginx

The following commands will now be run inside the nginx-proxy container. Debian-based operating systems have the ssl-cert package which is an easy wrapper for openssl certs and creates the default self-signed certs that will allow us to get started with reverse proxying SSL traffic. Use the following command to install the Nginx and ssl-cert packages:

$ apt update && apt install nginx ssl-cert -y 

Setting up the proxy config

With Nginx installed, we will need to configure the server blocks in the default configuration file of Nginx. We will create a server block that listens on port 80 for any traffic with the destination URL srv1.test.internal, and forward that traffic to our internal instance at http://10.187.151.36:80. To edit the default configuration file use the following command:

$ nano /etc/nginx/sites-enabled/default

The default file will already contain server blocks for forwarding traffic to a default location. We will be appending additional server blocks to the file. Paste in the following server block, changing the text in red to your own DNS name, port and internal instance IP address as needed:

server {
    server_name srv1.test.internal;
    listen 80;

    location / {
        proxy_pass_header Authorization;
        proxy_pass http://10.187.151.36:80;
        proxy_redirect   off;
        proxy_set_header Host $host;
        proxy_set_header X-Real-IP $remote_addr;
        proxy_set_header X-Forwarded-For $proxy_add_x_forwarded_for;
        proxy_set_header X-Forwarded-Host $server_name;
    }

    error_page   500 502 503 504  /50x.html;
    location = /50x.html {
        root   /usr/share/nginx/html;
    }
}

When it comes to handling SSL/TLS traffic the reverse proxy will handle the SSL certificate. The configuration below listens for SSL traffic on port 443 destined for srv1.test.internal , and forwards that traffic to the internal instance. In the example the destination port is also changed to port 80, we is common among web apps that don’t handle SSL encryption directly. The port can be changed to what the instance listens on. The included snakeoil.conf adds in the self-signed certificates for encrypting the SSL traffic, this can be changed to point to your own certificates if you have them.

server {
    server_name srv1.test.internal;
    listen 443 ssl;

    location / {
        proxy_pass_header Authorization;
        proxy_pass http://10.187.151.36:80;
        proxy_redirect   off;
        proxy_set_header Host $host;
        proxy_set_header X-Real-IP $remote_addr;
        proxy_set_header X-Forwarded-For $proxy_add_x_forwarded_for;
        proxy_set_header X-Forwarded-Host $server_name;
        proxy_set_header X-Forwarded-Proto https;
    }

    include snippets/snakeoil.conf;

    error_page   500 502 503 504  /50x.html;
    location = /50x.html {
        root   /usr/share/nginx/html;
    }

}

Starting and Enabling Nginx

Now that the configuration has been added it is time to restart nginx to apply the changes. In addition to restarting Nginx it is a good idea to enable the service as well, as not all distributions enable it automatically. Run the following commands to restart and enable Nginx:

$ systemctl restart nginx
$ systemctl enable nginx

Congratulations! The container is now setup. Exit from the shell terminal and return to your LXD host server by using the command:

$ exit
Posted on 7 Comments

LXD Dashboard – Installing from source in Alpine Linux

Launching an LXC based Alpine container

This how-to guide will take you through the installation steps to run the LXD dashboard in an LXC container on your system. This guide will assume that your system already has LXD installed and configured.

Start by launching a new instance using the Alpine 3.14 image. To launch the new instance and name it lxd-dashboard use the following command:

lxc launch images:alpine/3.14 lxd-dashboard

This will create a base container to use to install the LXD dashboard. Once the command finishes the container should be running. Now it is time to connect into the container and setup the software. Use the following command to obtain a shell connection to the instance, use the exit command at anytime to leave the shell:

lxc exec lxd-dashboard /bin/sh

Install Nginx and PHP

The following commands will now be run inside the lxd-dashboard container. The installation guide uses Nginx and PHP for the webserver platform and SQLite as a database. To install these packages use the following command:

apk update && apk add nginx php php-fpm php-curl sqlite php-sqlite3 php7-session php7-pdo php7-pdo_sqlite php7-json php7-openssl 

Setting up the LXD Dashboard

Using wget, the source code for the LXD dashboard can be downloaded from the GitHub repository. For this guide the v3.4.0 release will be used. Check for newer versions on the GitHub page and replace the version number with the latest. To download and extract the source code use the following two commands:

wget https://github.com/lxdware/lxd-dashboard/archive/v3.4.0.tar.gz
tar -xzf v3.4.0.tar.gz

A few web server files will need to moved into place for the web pages as well as the NGINX configuration. To copy these files use the following commands, making sure to change the version number to what was downloaded:

cp -a lxd-dashboard-3.4.0/default /etc/nginx/http.d/default.conf
mkdir -p /www
cp -a lxd-dashboard-3.4.0/lxd-dashboard /www/

The default.conf file used for Nginx needs slighly modified to work in Alpine Linux.

vi /etc/nginx/http.d/default.conf

Modify the default.conf file to read as follows, paying close attention to the text in red:

server {
	listen 80 default_server;
	listen [::]:80 default_server;
	root /www/lxd-dashboard;
	index index.php index.html;
	server_name _;

	location / {
		try_files $uri $uri/ =404;
	}
	
	location ~ \.php$ {
	fastcgi_pass 127.0.0.1:9000;
    	fastcgi_param SCRIPT_FILENAME $document_root$fastcgi_script_name;
    	include fastcgi_params;
    	include fastcgi.conf;
     }
}

The default user:group assigned to php-fpm is nobody:nobody. This will need to be changed to the user and group used by the webserver, nginx:www-data. Edit the /etc/php7/php-fpm.d/www.conf file and change the user and group assignment.

vi /etc/php7/php-fpm.d/www.conf

There are three main directories that LXDWARE uses to store persistent information for the application. You will need to create these directories and then assign appropriate ownership to the web server. To create the directories use the following commands:

mkdir -p /var/lxdware/data/sqlite
mkdir -p /var/lxdware/data/lxd
mkdir -p /var/lxdware/backups

The /www/lxd-dashboard/ directory, the /var/lxdware/ directory, and the contents within them all need to be owned by the web server user. Although the /etc/nginx/nginx.conf file lists nginx as the user, when configuring the LXD Dashboard, the nobody user was being used by the webserver. To set the proper permissions run the following commands:

chown -R nginx:www-data /var/lxdware/
chown -R nginx:www-data /www/

Starting and Enabling the Nginx and PHP services

The NGINX web server and PHP will both need to be started. To start the web server run the following commands:

service nginx start
service php-fpm7 start

To enable both services to start automatically when the server boots use the following two commands:

rc-update add nginx default
rc-update add php-fpm7 default

Congratulations! The container is now setup with the LXD dashboard software. Exit from the shell terminal and return to your LXD host server by using the command:

exit

Open a web browser and access the LXD dashboard by entering in the IP address of the instance. Use the lxc list command to view a list of the containers and their IP addresses on your LXD server.

Known Issues with Alpine

The php-fpm application in Alpine Linux is preventing the LXD Dashboard from exporting instance backups from the LXD server to the to /var/lxdware/backups/… directory.

Posted on 14 Comments

Version 3.1.0 Release

A new version of LXD Dashboard has just been released. This version focused on performance improvements to the web application. Also, labels for storage and memory unit size have been updated to correct values, changing from MB to MiB, etc.

The page load performance when viewing a single container or virtual machine page received the greatest improvement. Pages will now only load content based on the current tab selected within the page. When exporting a backup from the LXD server to the LXD Dashboard, a PHP process is now called to run in the background to handle this action. Previously exporting a backup would cause the page to stall on loading new pages until the export was finished.

The curl connection timeout has also been adjusted to from a 3 second timeout to a 1 second timeout when waiting for a GET request from the LXD server. This improves the page response when attempting to connect to an LXD server that may not longer be available. Page content refreshes now schedule a refresh only after a previous refresh completes rather than on a set schedule

Posted on 2 Comments

Version 3.0.0 Release

A new major release of the LXD Dashboard has just been released. There are a lot of changes to this release adding many more options to help manage LXD servers.

In this release the management of both container and virtual machines instances has been separated into two different pages. This has many added benefits to managing instances as containers and virtual machines use several different configuration properties. Also, users of legacy LXD versions (3.0.3) can now use the LXD Dashboard to manage their containers.

A new image catalog has been added to make it quick and easy to download LXD images. Users can still use the form to download images not listed in the catalog. This makes it simple to download either containers or virtual machines of your favorite Linux distributions.

Remote LXD hosts now have an option for an external IP address and port. This will provide the web socket connection a different address than what the LXD Dashboard uses to communicate to the server. If no external address and port are provided the web socket connection uses the default address and port.

Users can now manage the client.crt certificate that LXD uses to connect to LXD servers. This can be found in the settings page. If a user deletes the existing certificate, a new one will automatically be populated. This allows users to remove expired certificates as well as now changing the certificate used if the LXD Dashboard is cloned.

Both containers and virtual machines now display the CPU usage when viewing the specific instance.

Changes to the theme have added a fresh look with slightly darker pages.

Posted on Leave a comment

Version 2.3.0 Release

Version 2.3.0 has just been released and adds a few new features as well as a minor bug fix.

Creating networks and Storage Volumes on clustered hosts require a subset of the configuration be passed to each cluster member before creating the object. In the prior release this functionality was added to the web form, in this release it has now been added when submitting a network or storage volume through JSON code.

If you had collapsed the sidebar menu in the previous versions, it would revert back to the original expanded state on page reloads or when clicking to a new page. Using web browser local storage, the state of the sidebar is now saved retaining the setting through page loads or clicking new pages within the dashboard.

When configuring the memory or CPU options in the the web form of an instance, some options were specific to only container or virtual-machine type instances. These settings have now been disabled depending on which instance type is loaded. This makes it easier for the user to know which settings do not apply to their instance. Also in the back-end PHP code, the processing of these configuration parameters has been restricted based on which type of instance submitted the configuration changes. In the previous release the lack of this code prevented virtual-machine types to update using the web form.

Posted on Leave a comment

Version 2.2.0 Release

Version 2.2.0 continues adding configuration options using forms in the dashboard focusing this time on Storage Pools, Storage Volumes, and Projects. Added functionality for Network configurations in clustered LXD environments has also been added.

Storage Pools

A large set up configurations options have been added to the web form for creating new storage pools. Each type of storage pool (btrfs, ceph, cephfs, dir, lvm, and zfs) all have their own unique set of configuration properties that change when selecting the pool type. Support for storage pools on clustered LXD hosts has also been configured

Storage Volumes

When click on a storage pool, the default list of storage volumes is now filtered by default to show custom type storage volumes. There is a quick link to show all volumes types removing the filter. Configuration options for storage volumes has also been added to the web form when creating a new storage volume.

Projects

Support for creating projects using both the a web form or JSON has been added. The web form now includes a large set of configuration properties that allow for greater customization of projects. The list of projects also now includes whether the project features networks in addition to the existing featured options.

Networks

Support for creating networks in clustered LXD hosts has been added.

Posted on 4 Comments

Version 2.1.0 Released – Extending Network, Network ACL and Instance Device form options and adding Exec terminal.

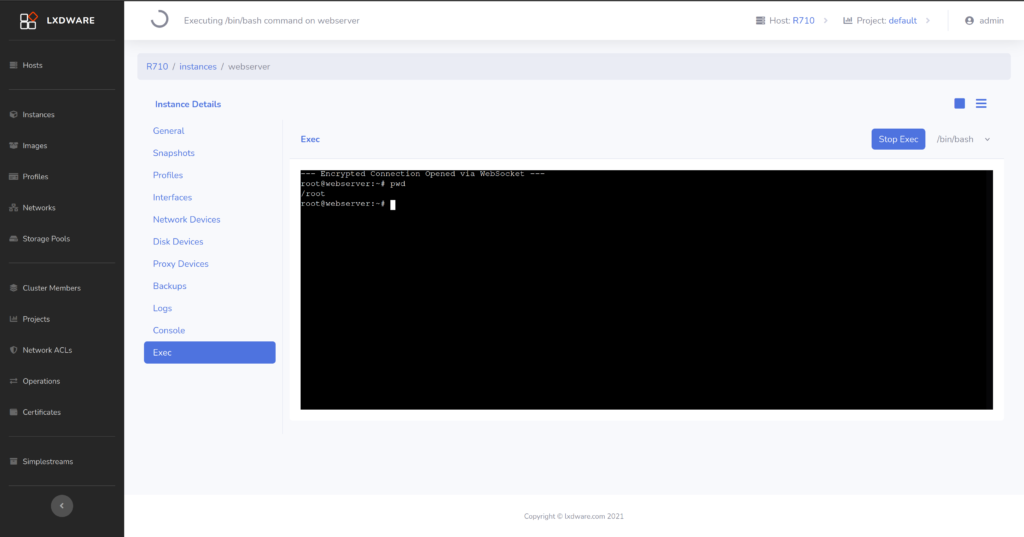
Version 2.1.0 is an exciting release that makes it easier to configure LXD servers in many areas. This release has focused on providing enhanced networking options and instance device options. Version 2.1.0 also adds the Exec terminal, offering both Console and Exec interactions with instances. A new “check for updates” button also has been added to ensure your version of the dashboard is up-to-date.

Instance Devices

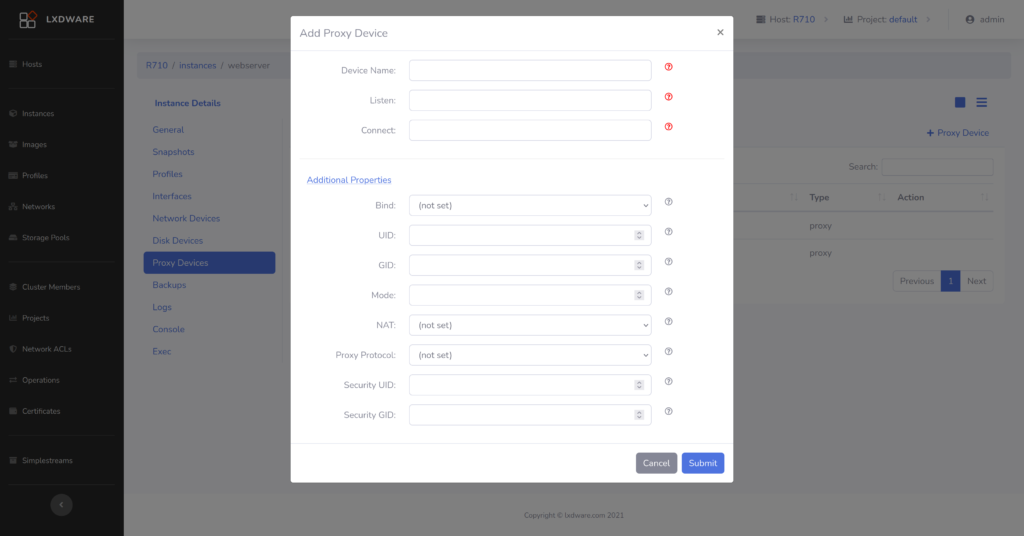
With this release a user now has the ability to add several device types to an instance configuration file using a web form. These device types include network devices, disk devices, and proxy devices.

The user can choose between using network or nictype property sets for the network device. Each option provides the appropriate configuration properties and hints to guide the user in configuring these properties. Using the network property set, users can add bridge, macvlan, ovn, and sriov network devices to the instance. The nictype property set provides options for bridged, ipvlan, macvlan, p2p, physical, routed, and sriov network devices.

Full property options have also been included for both disk devices and proxy devices. Users can now add and remove devices on their instance without having to directly edit the JSON configuration.

Instance Exec

The console connection has provided a way to interact with instances directly from an xterm interface in the dashboard. Similar to the console connection, the exec connection provides a direct connection to interact with an instance without having to login through the console screen. A user can also choose between using a bash or sh shell. Users with the ADMIN or OPERATOR role assigned will be able to take advantage of this option.

Network

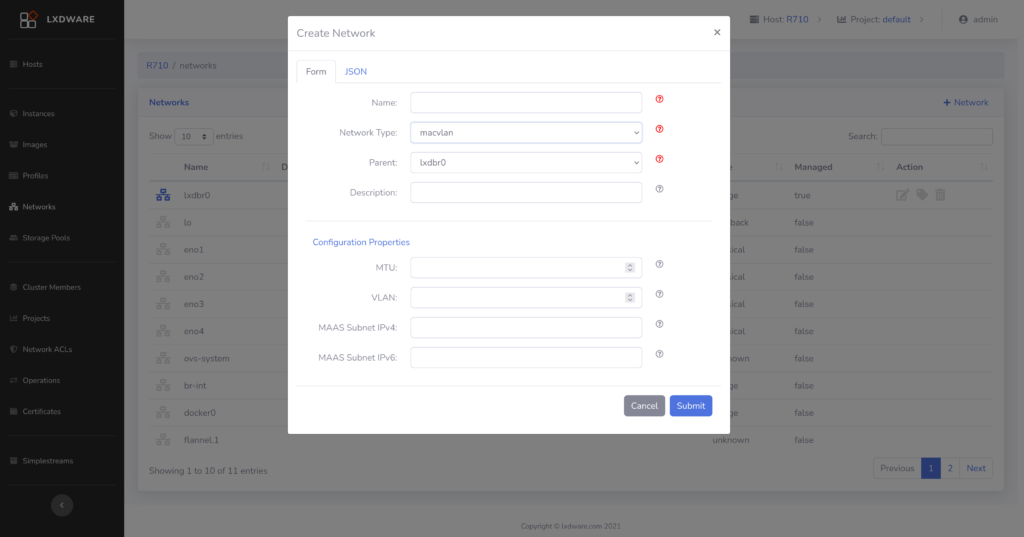
The web form for creating networks has been enhanced to include the configuration options for bridge, macvlan, ovn, physical, and sriov networks. Users can choose to expand the additional configuration properties to aid in setting up more complex networks. Options will populate based on which network type is selected.

Network ACLs

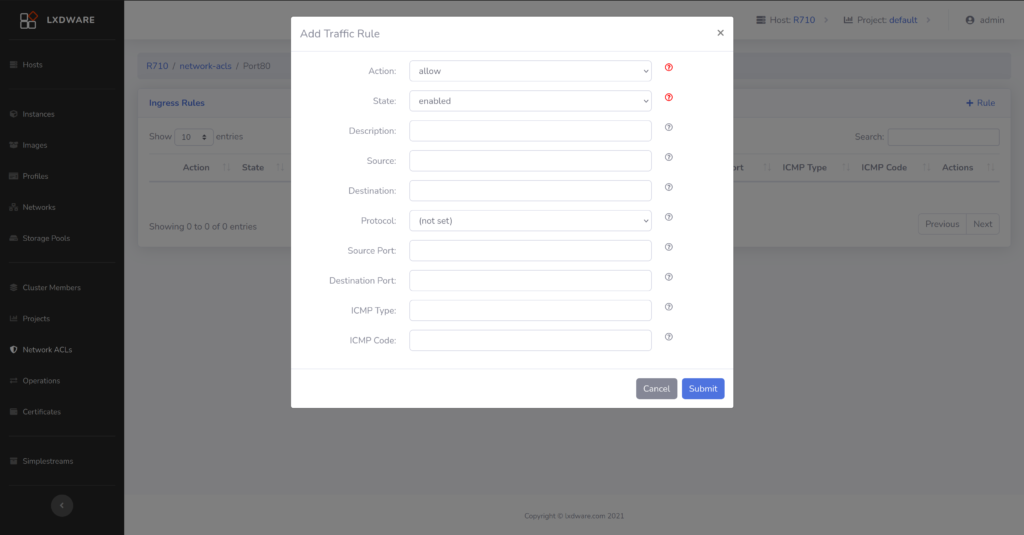
Users have already had the ability to create Network ACLs, but no users an configure both ingress and egress rules for a Network ACL using a web form. After creating a Network ACL, the user can click on the Egress/Ingress rules for that ACL and add or remove rules. This makes it easy to configure complex rule sets and we as simple rule sets.

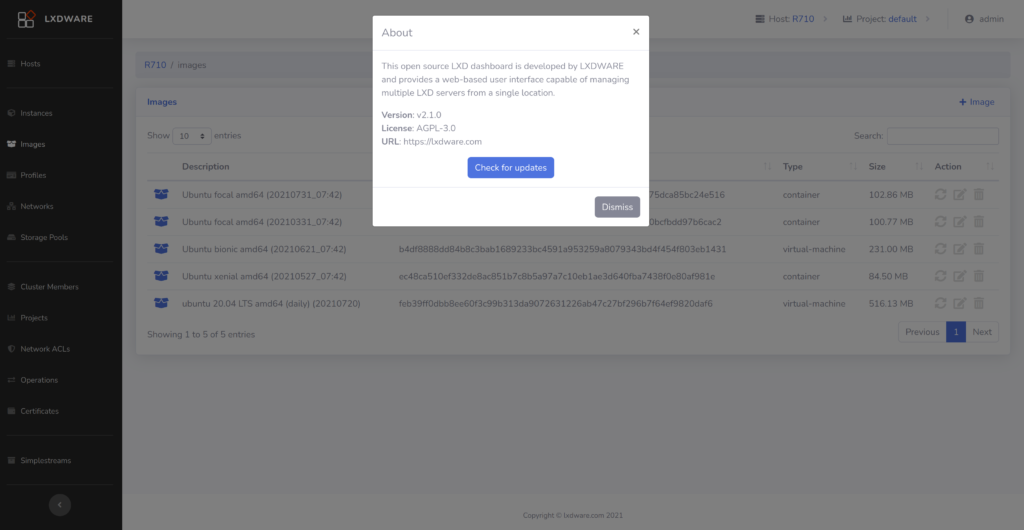
Users can now check for updates directly from within the LXD Dashboard. A new “Check for updates” button has been added to the About menu. When clicked the dashboard will reach out to GitHub and compare the latest release version with the installed version. A small message will be displayed indicating if a newer version is available.

Form hints

To keep the user interface consistent, user hints have been added to all the forms within the dashboard. Hints also indicate required or non-required fields when creating items in LXD.

Next release

One of the major focuses of the next release will be to continue adding configuration properties to the web forms in the dashboard. Expect to see enhancements in the Storage Pool and Storage Volume forms.