Posted on 11 Comments

Installing the LXD dashboard on Ubuntu 22.04

This how-to guide will take you through the installation steps to download and setup the LXD dashboard on Ubuntu 22.04. This guide will use Ubuntu through an LXD container, but can be also installed through a traditional installation.

Assuming that your system already has LXD installed and configured, start by launching a new instance using the Ubuntu 22.04 image. To launch the new instance and name it lxd-dashboard use the following command:

lxc launch images:ubuntu/22.04 lxd-dashboard

This will create a base container to use to install the LXD dashboard. Once the command finishes the container should be running. Now it is time to connect into the container and setup the software. Use the following command to obtain a bash shell connection to the instance, use the exit command at anytime to leave the shell:

lxc exec lxd-dashboard /bin/bash

The following commands will now be run inside the lxd-dashboard container. Verify that the terminal prompt reads root@lxd-dashboard:~# before installing any software. The LXD dashboard uses Nginx and PHP for the webserver platform and SQLite as a database. To install these packages use the following command:

apt update && apt install wget nginx php-fpm php-curl sqlite3 php-sqlite3 -y 

Using wget, the source code for the LXD dashboard can be downloaded from the GitHub repository. For this guide the v3.7.0 release will be used. Check for newer versions on the GitHub page and replace the version number with the latest. If your container is having trouble reaching out to the internet, see https://discuss.linuxcontainers.org/t/containers-do-not-have-outgoing-internet-access/10844/4. To download and extract the source code use the following two commands:

wget https://github.com/lxdware/lxd-dashboard/archive/v3.7.0.tar.gz
tar -xzf v3.7.0.tar.gz

A few web server files will need to moved into place for the web pages as well as the NGINX configuration. To copy these files use the following commands, making sure to change the version number to what was downloaded:

cp -a lxd-dashboard-3.7.0/default /etc/nginx/sites-available/
cp -a lxd-dashboard-3.7.0/lxd-dashboard /var/www/html/

The default site configuration file (/etc/nginx/sites-enabled/default) in Nginx has now been replaced. In Ubuntu this file should be linked from the sites-available directory. The version of php-fpm changes over time and the file path listed in the default configuration will need to be updated for your environment. Ubuntu 20.04 used version 7.4, but Ubuntu 22.04 now uses version 8.1. Edit the file using a text editor (nano, vi, etc) and comment out the path to version 7.4 and uncomment the path for version 8.1.

server {
	listen 80 default_server;
	listen [::]:80 default_server;
	root /var/www/html/lxd-dashboard;
	index index.php index.html;
	server_name _;

	location / {
		try_files $uri $uri/ =404;
	}
	
	location ~ \.php$ {
        #include snippets/fastcgi-php.conf;
        #fastcgi_pass unix:/var/run/php/php7.4-fpm.sock;
	#fastcgi_pass unix:/run/php/php7.4-fpm.sock;
	fastcgi_pass unix:/run/php/php8.1-fpm.sock;
    	fastcgi_param SCRIPT_FILENAME $document_root$fastcgi_script_name;
    	include fastcgi_params;
    	include snippets/fastcgi-php.conf;
     }
}

There are three main directories that LXDWARE uses to store persistent information for the application. You will need to create these directories and then assign appropriate ownership to the web server. To create the directories use the following commands:

mkdir -p /var/lxdware/data/sqlite
mkdir -p /var/lxdware/data/lxd
mkdir -p /var/lxdware/backups

The /var/www/html/lxd-dashboard/ directory, the /var/lxdware/ directory, and the contents within them all need to be owned by the web server user. To set the proper permissions run the following commands:

chown -R www-data:www-data /var/lxdware/
chown -R www-data:www-data /var/www/html

The NGINX web server will need to be restarted to apply the web server configuration changes made above. To restart the web server run the following command:

systemctl restart nginx

Congratulations! The LXD dashboard is now setup and ready to use. Exit from the bash terminal and return to your LXD host server by using the command:
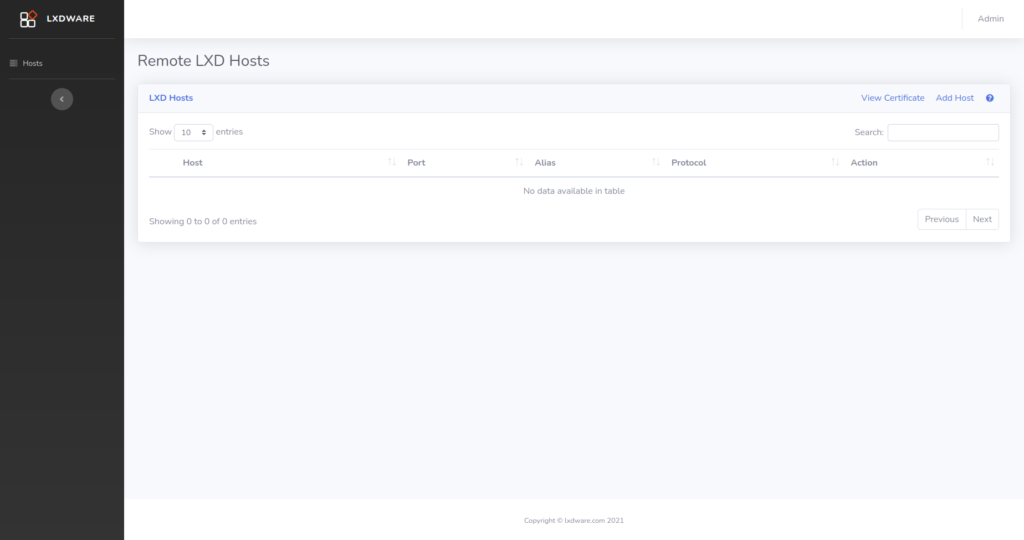
exit

Open a web browser and access the LXD dashboard by entering in the IP address of the instance. Use the lxc list command to view a list of the containers and their IP addresses on your LXD server.

Optional Port Forward Configuration for LXD containers

Port forwarding can be used to make the lxd-dashboard instance accessible to others computers outside of the server. The lxd-dashboard listens on port 80 for web traffic. In this how-to guide the host’s port 80 will be forwarded to the instance’s port 80. For more information on port forwarding view the how-to guide Forwarding host ports to LXD instances.

To create a new profile named proxy-port-80 use the following command:

lxc profile create proxy-port-80

To configure the profile to forward the port 80 from the host server to port 80 on the instance, use the following command:

lxc profile device add proxy-port-80 hostport80 proxy connect="tcp:127.0.0.1:8080" listen="tcp:0.0.0.0:80"

To apply the newly created profile to the lxd-dashboard instance and begin forwarding port 80 traffic to your instance run the following command:

lxc profile add lxd-dashboard proxy-port-80

Open a web browser and access the LXD dashboard by entering in the IP address of the host server.

Posted on 2 Comments

Simple LXD reverse proxy using HAProxy

Launching the container

This how-to guide will take you through the steps to setup a reverse proxy on your system by using a LXD container to run HAProxy and then configure it pass networking traffic to internal containers. This guide will assume that your system is already configured as an LXD server.

Before setting up the reverse proxy, run the following command to get a list of IP addresses for your containers, noting the address of the instances to forward traffic to:

$ lxc list

Start by launching a new instance using the Ubuntu 20.04 image. To launch the new instance and name it haproxy use the following command:

$ lxc launch ubuntu:20.04 haproxy

This will create a base container where we will install HAProxy. Once the command finishes the container should be running. We will need to setup port forwarding (proxy port) for the TCP/UDP ports we want HAProxy to handle. The plan is to have port 80 (http) and 443 (https) forwarded to the haproxy container and from there it will redirect traffic to the appropriate internal instances. To forward the host LXD server ports to the haproxy instance, we can either edit the haproxy container configuration directly or create a profile for the port forwarding and then attached it to the container. In this tutorial I will edit the container’s configuration directly. See https://lxdware.com/forwarding-host-ports-to-lxd-instances/(opens in a new tab) for instructions on creating profiles as an option.

Use the following commands to edit the configuration of the haproxy container and forward both ports 80 and 443 from the host LXD server to the container:

$ lxc config device add haproxy hostport80 proxy listen=tcp:0.0.0.0:80 connect=tcp:127.0.0.1:80
$ lxc config device add haproxy hostport443 proxy listen=tcp:0.0.0.0:443 connect=tcp:127.0.0.1:443

Now it is time to connect into the container and setup the software. Use the following command to obtain a bash shell connection to the instance, use the exit command at anytime to leave the shell:

$ lxc exec haproxy /bin/bash

Installing HAProxy

The following commands will now be run inside the haproxy container. Use the following command to install the HAProxy package:

$ apt update && apt install haproxy -y 

Setting up the proxy config

With HAProxy installed, we will need to add a frontend and backend that listens for ports 80 and 443. Since port 443 will listen for encrypted SSL traffic, we need to create a separate frontend handling SSL traffic. Both frontends listen for the destination URL and assign an ACL Host to traffic matching the URL. If the traffic is matched to an ACL host, it is then assigned the appropriate backend to send traffic to. To edit the configuration file use the following command:

$ /etc/haproxy/haproxy.cfg

Append the highlighted code below. In the example two different internal containers are both using port 80 and 443. One is running WordPress and the other Nextcloud. If the correct URL is coming into HAProxy, the traffic is then assigned a backend which define the internal instance to direct traffic to.

global
	log /dev/log	local0
	log /dev/log	local1 notice
	chroot /var/lib/haproxy
	stats socket /run/haproxy/admin.sock mode 660 level admin expose-fd listeners
	stats timeout 30s
	user haproxy
	group haproxy
	daemon

	# Default SSL material locations
	ca-base /etc/ssl/certs
	crt-base /etc/ssl/private

	# See: https://ssl-config.mozilla.org/#server=haproxy&server-version=2.0.3&config=intermediate
        ssl-default-bind-ciphers ECDHE-ECDSA-AES128-GCM-SHA256:ECDHE-RSA-AES128-GCM-SHA256:ECDHE-ECDSA-AES256-GCM-SHA384:ECDHE-RSA-AES256-GCM-SHA384:ECDHE-ECDSA-CHACHA20-POLY1305:ECDHE-RSA-CHACHA20-POLY1305:DHE-RSA-AES128-GCM-SHA256:DHE-RSA-AES256-GCM-SHA384
        ssl-default-bind-ciphersuites TLS_AES_128_GCM_SHA256:TLS_AES_256_GCM_SHA384:TLS_CHACHA20_POLY1305_SHA256
        ssl-default-bind-options ssl-min-ver TLSv1.2 no-tls-tickets

defaults
	log	global
	mode	http
	option	httplog
	option	dontlognull
        timeout connect 5000
        timeout client  50000
        timeout server  50000
	errorfile 400 /etc/haproxy/errors/400.http
	errorfile 403 /etc/haproxy/errors/403.http
	errorfile 408 /etc/haproxy/errors/408.http
	errorfile 500 /etc/haproxy/errors/500.http
	errorfile 502 /etc/haproxy/errors/502.http
	errorfile 503 /etc/haproxy/errors/503.http
	errorfile 504 /etc/haproxy/errors/504.http


frontend localhost80
    bind *:80
    mode tcp

    #Set acl based on domain name
    acl host_nextcloud hdr(host) -i srv2.test.internal
    acl host_wordpress hdr(host) -i srv1.test.internal

    #Set backend for each acl
    use_backend nextcloud_http if host_nextcloud
    use_backend wordpress_http if host_wordpress


frontend localhost443
   bind *:443
   option tcplog
   mode tcp
   acl tls req.ssl_hello_type 1
   tcp-request inspect-delay 5s
   tcp-request content accept if tls

   #Set acl based on the domain name
   acl is_nextcloud req.ssl_sni -i srv2.test.internal
   acl is_wordpress req.ssl_sni -i srv1.test.internal

   #Set backend for each acl
   use_backend nextcloud_https if is_nextcloud
   use_backend wordpress_https if is_wordpress


backend nextcloud_http
   mode tcp
   server ubuntu-nextcloud 10.187.151.36:80 check

backend wordpress_http
   mode tcp
   server ubuntu-wordpress 10.187.151.36:80 check

backend nextcloud_https
   mode tcp
   option ssl-hello-chk
   server ubuntu-nextcloud 10.187.151.36:443 check

backend wordpress_https
   mode tcp
   option ssl-hello-chk
   server ubuntu-wordpress 10.187.151.36:443 check

Starting and Enabling HAProxy

Now that the configuration has been added it is time to restart HAProxy to apply the changes. In addition to restarting HAProxy it is a good idea to enable the service as well, as not all distributions enable it automatically. Run the following commands to restart and enable HAProxy:

$ systemctl restart haproxy
$ systemctl enable haproxy

Congratulations! The container is now setup. Exit from the shell terminal and return to your LXD host server by using the command:

$ exit

Additional thoughts

The backend configuration in example lists only a single instance to forward traffic to for each backend. Additional instances can be defined in the same backend allowing for load balancing if two or more servers are running the same software in a High Availability (HA) setup. HAProxy also has the ability to monitor (check) the health of the backend instance and it can be configured to display a statics web page to show the health of the backend.

Also, frontends can listen to more than one port. Since port 443 uses SSL encryption, a separate frontend was created specifically to handle the SSL traffic. This example forwards SSL traffic directly to an internal instance using TCP mode, where the internal instance handles the SSL certificates. HAProxy can be configured to handle the SSL certificates instead.

Posted on Leave a comment

Simple Nginx Reverse Proxy in LXD

Launching the container

This how-to guide will take you through the steps to setup an Nginx reverse proxy on your system by using an LXD container to run Nginx and configure it to run as a reverse proxy, forwarding traffic to internal containers. This guide will assume that your system is already configured as an LXD server.

Before setting up the reverse proxy, run the following command to get a list of IP addresses for your containers, noting the address of the instances to forward traffic to:

$ lxc list

Start by launching a new instance using the Ubuntu 20.04 image. To launch the new instance and name it nginx-proxy use the following command:

$ lxc launch ubuntu:20.04 nginx-proxy

This will create a base container where we will install Nginx. Once the command finishes the container should be running. We will need to setup port forwarding (proxy port) for the TCP/UDP ports we want Nginx to handle. The plan is to have port 80 and 443 forwarded to the nginx-proxy container and from there it will redirect traffic to the appropriate instances. To forward ports, we can either edit the nginx-proxy container directly or create a profile for the port forwarding and attached it to the container. In this tutorial I will edit the container’s configuration directly. See https://lxdware.com/forwarding-host-ports-to-lxd-instances/(opens in a new tab) for instructions on creating profiles as an option.

Use the following commands to edit the configuration of the nginx-proxy container and forward both ports 80 and 443 from the host LXD server to the container:

$ lxc config device add nginx-proxy hostport80 proxy listen=tcp:0.0.0.0:80 connect=tcp:127.0.0.1:80
$ lxc config device add nginx-proxy hostport443 proxy listen=tcp:0.0.0.0:443 connect=tcp:127.0.0.1:443

Now it is time to connect into the container and setup the software. Use the following command to obtain a bash shell connection to the instance, use the exit command at anytime to leave the shell:

$ lxc exec nginx-proxy /bin/bash

Installing Nginx

The following commands will now be run inside the nginx-proxy container. Debian-based operating systems have the ssl-cert package which is an easy wrapper for openssl certs and creates the default self-signed certs that will allow us to get started with reverse proxying SSL traffic. Use the following command to install the Nginx and ssl-cert packages:

$ apt update && apt install nginx ssl-cert -y 

Setting up the proxy config

With Nginx installed, we will need to configure the server blocks in the default configuration file of Nginx. We will create a server block that listens on port 80 for any traffic with the destination URL srv1.test.internal, and forward that traffic to our internal instance at http://10.187.151.36:80. To edit the default configuration file use the following command:

$ nano /etc/nginx/sites-enabled/default

The default file will already contain server blocks for forwarding traffic to a default location. We will be appending additional server blocks to the file. Paste in the following server block, changing the text in red to your own DNS name, port and internal instance IP address as needed:

server {
    server_name srv1.test.internal;
    listen 80;

    location / {
        proxy_pass_header Authorization;
        proxy_pass http://10.187.151.36:80;
        proxy_redirect   off;
        proxy_set_header Host $host;
        proxy_set_header X-Real-IP $remote_addr;
        proxy_set_header X-Forwarded-For $proxy_add_x_forwarded_for;
        proxy_set_header X-Forwarded-Host $server_name;
    }

    error_page   500 502 503 504  /50x.html;
    location = /50x.html {
        root   /usr/share/nginx/html;
    }
}

When it comes to handling SSL/TLS traffic the reverse proxy will handle the SSL certificate. The configuration below listens for SSL traffic on port 443 destined for srv1.test.internal , and forwards that traffic to the internal instance. In the example the destination port is also changed to port 80, we is common among web apps that don’t handle SSL encryption directly. The port can be changed to what the instance listens on. The included snakeoil.conf adds in the self-signed certificates for encrypting the SSL traffic, this can be changed to point to your own certificates if you have them.

server {
    server_name srv1.test.internal;
    listen 443 ssl;

    location / {
        proxy_pass_header Authorization;
        proxy_pass http://10.187.151.36:80;
        proxy_redirect   off;
        proxy_set_header Host $host;
        proxy_set_header X-Real-IP $remote_addr;
        proxy_set_header X-Forwarded-For $proxy_add_x_forwarded_for;
        proxy_set_header X-Forwarded-Host $server_name;
        proxy_set_header X-Forwarded-Proto https;
    }

    include snippets/snakeoil.conf;

    error_page   500 502 503 504  /50x.html;
    location = /50x.html {
        root   /usr/share/nginx/html;
    }

}

Starting and Enabling Nginx

Now that the configuration has been added it is time to restart nginx to apply the changes. In addition to restarting Nginx it is a good idea to enable the service as well, as not all distributions enable it automatically. Run the following commands to restart and enable Nginx:

$ systemctl restart nginx
$ systemctl enable nginx

Congratulations! The container is now setup. Exit from the shell terminal and return to your LXD host server by using the command:

$ exit
Posted on 7 Comments

LXD Dashboard – Installing from source in Alpine Linux

Launching an LXC based Alpine container

This how-to guide will take you through the installation steps to run the LXD dashboard in an LXC container on your system. This guide will assume that your system already has LXD installed and configured.

Start by launching a new instance using the Alpine 3.14 image. To launch the new instance and name it lxd-dashboard use the following command:

lxc launch images:alpine/3.14 lxd-dashboard

This will create a base container to use to install the LXD dashboard. Once the command finishes the container should be running. Now it is time to connect into the container and setup the software. Use the following command to obtain a shell connection to the instance, use the exit command at anytime to leave the shell:

lxc exec lxd-dashboard /bin/sh

Install Nginx and PHP

The following commands will now be run inside the lxd-dashboard container. The installation guide uses Nginx and PHP for the webserver platform and SQLite as a database. To install these packages use the following command:

apk update && apk add nginx php php-fpm php-curl sqlite php-sqlite3 php7-session php7-pdo php7-pdo_sqlite php7-json php7-openssl 

Setting up the LXD Dashboard

Using wget, the source code for the LXD dashboard can be downloaded from the GitHub repository. For this guide the v3.4.0 release will be used. Check for newer versions on the GitHub page and replace the version number with the latest. To download and extract the source code use the following two commands:

wget https://github.com/lxdware/lxd-dashboard/archive/v3.4.0.tar.gz
tar -xzf v3.4.0.tar.gz

A few web server files will need to moved into place for the web pages as well as the NGINX configuration. To copy these files use the following commands, making sure to change the version number to what was downloaded:

cp -a lxd-dashboard-3.4.0/default /etc/nginx/http.d/default.conf
mkdir -p /www
cp -a lxd-dashboard-3.4.0/lxd-dashboard /www/

The default.conf file used for Nginx needs slighly modified to work in Alpine Linux.

vi /etc/nginx/http.d/default.conf

Modify the default.conf file to read as follows, paying close attention to the text in red:

server {
	listen 80 default_server;
	listen [::]:80 default_server;
	root /www/lxd-dashboard;
	index index.php index.html;
	server_name _;

	location / {
		try_files $uri $uri/ =404;
	}
	
	location ~ \.php$ {
	fastcgi_pass 127.0.0.1:9000;
    	fastcgi_param SCRIPT_FILENAME $document_root$fastcgi_script_name;
    	include fastcgi_params;
    	include fastcgi.conf;
     }
}

The default user:group assigned to php-fpm is nobody:nobody. This will need to be changed to the user and group used by the webserver, nginx:www-data. Edit the /etc/php7/php-fpm.d/www.conf file and change the user and group assignment.

vi /etc/php7/php-fpm.d/www.conf

There are three main directories that LXDWARE uses to store persistent information for the application. You will need to create these directories and then assign appropriate ownership to the web server. To create the directories use the following commands:

mkdir -p /var/lxdware/data/sqlite
mkdir -p /var/lxdware/data/lxd
mkdir -p /var/lxdware/backups

The /www/lxd-dashboard/ directory, the /var/lxdware/ directory, and the contents within them all need to be owned by the web server user. Although the /etc/nginx/nginx.conf file lists nginx as the user, when configuring the LXD Dashboard, the nobody user was being used by the webserver. To set the proper permissions run the following commands:

chown -R nginx:www-data /var/lxdware/
chown -R nginx:www-data /www/

Starting and Enabling the Nginx and PHP services

The NGINX web server and PHP will both need to be started. To start the web server run the following commands:

service nginx start
service php-fpm7 start

To enable both services to start automatically when the server boots use the following two commands:

rc-update add nginx default
rc-update add php-fpm7 default

Congratulations! The container is now setup with the LXD dashboard software. Exit from the shell terminal and return to your LXD host server by using the command:

exit

Open a web browser and access the LXD dashboard by entering in the IP address of the instance. Use the lxc list command to view a list of the containers and their IP addresses on your LXD server.

Known Issues with Alpine

The php-fpm application in Alpine Linux is preventing the LXD Dashboard from exporting instance backups from the LXD server to the to /var/lxdware/backups/… directory.

Posted on 18 Comments

Installing the LXD dashboard in an LXC container – v2.x.x

This how-to guide will take you through the installation steps to run the LXD dashboard in an LXC container on your system. This guide will assume that your system already has LXD installed and configured.

Start by launching a new instance using the official Ubuntu 20.04 image. To launch the new instance and name it lxd-dashboard use the following command:

$ lxc launch ubuntu:20.04 lxd-dashboard

This will create a base container to use to install the LXD dashboard. Once the command finishes the container should be running. Now it is time to connect into the container and setup the software. Use the following command to obtain a bash shell connection to the instance, use the exit command at anytime to leave the shell:

$ lxc exec lxd-dashboard /bin/bash

The following commands will now be run inside the lxd-dashboard container. Verify that the terminal prompt reads root@lxd-dashboard:~# before installing any software. The LXD dashboard uses Nginx and PHP for the webserver platform and SQLite as a database. To install these packages use the following command:

$ apt update && apt install nginx php-fpm php-curl sqlite3 php-sqlite3 -y 

Using wget, the source code for the LXD dashboard can be downloaded from the GitHub repository. For this guide the v2.2.0 release will be used. Check for newer versions on the GitHub page and replace the version number with the latest. To download and extract the source code use the following two commands:

$ wget https://github.com/lxdware/lxd-dashboard/archive/v2.2.0.tar.gz
 $ tar -xzf v2.2.0.tar.gz

A few web server files will need to moved into place for the web pages as well as the NGINX configuration. To copy these files use the following commands, making sure to change the version number to what was downloaded:

$ cp -a lxd-dashboard-2.2.0/default /etc/nginx/sites-available/
 $ cp -a lxd-dashboard-2.2.0/lxd-dashboard /var/www/html/

There are three main directories that LXDWARE uses to store persistent information for the application. You will need to create these directories and then assign appropriate ownership to the web server. To create the directories use the following commands:

$ mkdir -p /var/lxdware/data/sqlite
 $ mkdir -p /var/lxdware/data/lxd
 $ mkdir -p /var/lxdware/backups

The /var/www/html/lxd-dashboard/ directory, the /var/lxdware/ directory, and the contents within them all need to be owned by the web server user. To set the proper permissions run the following commands:

$ chown -R www-data:www-data /var/lxdware/
 $ chown -R www-data:www-data /var/www/html

The NGINX web server will need to be restarted to apply the web server configuration changes made above. To restart the web server run the following command:

$ systemctl restart nginx

Congratulations! The container is now setup with the LXD dashboard software. Exit from the bash terminal and return to your LXD host server by using the command:

$ exit

Open a web browser and access the LXD dashboard by entering in the IP address of the instance. Use the lxc list command to view a list of the containers and their IP addresses on your LXD server.

Optional Port Forward Configuration

Port forwarding can be used to make the lxd-dashboard instance accessible to others computers outside of the server. The lxd-dashboard listens on port 80 for web traffic. In this how-to guide the host’s port 80 will be forwarded to the instance’s port 80. For more information on port forwarding view the how-to guide Forwarding host ports to LXD instances.

To create a new profile named proxy-port-80 use the following command:

$ lxc profile create proxy-port-80

To configure the profile to forward the port 80 from the host server to port 80 on the instance, use the following command:

$ lxc profile device add proxy-port-80 hostport80 proxy connect="tcp:127.0.0.1:8080" listen="tcp:0.0.0.0:80"

To apply the newly created profile to the lxd-dashboard instance and begin forwarding port 80 traffic to your instance run the following command:

$ lxc profile add lxd-dashboard proxy-port-80

Open a web browser and access the LXD dashboard by entering in the IP address of the host server.

Posted on 9 Comments

Adding remote hosts in the LXD dashboard

Initial setup

When you first login to the LXD dashboard you will be redirected to the Remote LXD Hosts page. Here you can setup the parameters needed to connect to the LXD servers that you plan to manage.

Help instructions are available on the Remote LXD Hosts page and can be viewed by clicking the help icon located at the top right of the table.

Client Certificate

A client certificate is generated when you first setup the LXD dashboard and is used to securely connect to your LXD servers. Click the View Certificate link to display the certificate. Copy and paste the certificate information into a new file on your LXD server named lxdware.crt.

Import the certificate by running the lxc config trust add lxdware.crt command on your server. If your server was not setup to listen for incoming connections run the lxc config set core.https_address [::] command.

Adding your LXD Server

Now that your LXD server is listening for remote connections and trusts the LXD dasbhoard certificate it is time to add in the connection details of your LXD server. Click the Add Host link to display an entry form.

The Address field can be either an IP address or FQDN of your server. LXD uses port 8443 by default to connect remotely to hosts, however the Port field can be changed for your environment. The Alias field is just a friendly string to quickly identify and differentiate your server.

Hosts Table

Once your host has been added to the table, click the link provided in the Host column to start managing your LXD server. You are not limited to the number of hosts you wish to add.

Removing hosts can be completed by clicking on the delete icon in the table. This will remove your host connection information from the LXD dashboard database. If you are removing a host be sure to also remove the client certificate from your LXD server.

Posted on Leave a comment

Creating a Windows Server 2019 instance in LXD

With some of the more recent updates to LXD, it is becoming easier to run Windows as a virtual machine. This how-to guide will walk through the steps to get Windows Server 2019 up and running as an LXD virtual machine.

I will be using Ubuntu 20.04 as my desktop operating system, where I already have LXD installed and initialized. I will need to install the Remote Viewer application which will be used to connect to the VGA console of the Windows virtual machine. To install it use the following command:

$ sudo apt install virt-viewer

If you don’t already have an ISO file of the operating system, Microsoft allows users to download an evaluation copy of Windows Server 2019 . You will need a license key to use beyond the evaluation period. An ISO file needed for the virtual machine can be downloaded from https://www.microsoft.com/en-US/evalcenter/evaluate-windows-server-2019?filetype=ISO. The ISO filename was very long (17763.737.190906-2324.rs5_release_svc_refresh_SERVER_EVAL_x64FRE_en-us_1.iso) so for the sake of this how-to guide, I renamed it to Server2019.iso.

In many virtual environments, the Windows operating system needs to have virtio drivers installed during the installation process to detect hardware such as the hard drive. You will need a copy of these drivers. An ISO file of the virtio drivers can be downloaded from https://fedorapeople.org/groups/virt/virtio-win/direct-downloads/stable-virtio/virtio-win.iso. The current stable version at the time of this guide is virtio-win-0.1.185.iso.

Now that we have all the necessary components downloaded let’s create the virtual machine. We will create an empty instance named win2019 and set the instance type to virtual machine. To create the instance use the command:

$ lxc init win2019 --empty --vm

Before we start the virtual machine, there are special configurations that need to be setup such as booting from the downloaded ISO files as well as allocating CPU, RAM, and disk space. We will achieve this by creating two profiles that will be attached to the virtual machine.

The first profile will set the necessary hardware resources required to run Windows. This can be adjusted for your environment. We will call this profile windows-required and configure the profile to use 2 CPUs, 4GB or memory, and 30GB of hard disk space. We will also need to turn secure boot off. For additional help on creating profiles see the guide Setting instance CPU and memory limits. To create the profile and add the necessary configurations use the following commands:

$ lxc profile create windows-required

 $ lxc profile set windows-required limits.cpu=2 limits.memory=4GB security.secureboot=false

 $ lxc profile device add windows-required root disk path=/ pool=default size=30GB

The second profile is designed to be removed once Windows is installed. This profile will contain the filepaths for the ISO images downloaded earlier. These filepaths will need to be adjusted for your environment, but will server a reference. We will also need to allow LXD read, write, and lock (rwk) access to our download location through apparmor. To create the profile and add both the Server2019.iso and virtio-win-0.1.185.iso files use the following commands:

$ lxc profile create windows-installation

 $ lxc profile set windows-installation raw.qemu="-drive file=/home/matthew/Downloads/Server2019.iso,index=0,media=cdrom,if=ide -drive file=/home/matthew/Downloads/virtio-win-0.1.185.iso,index=1,media=cdrom,if=ide"

 $ lxc profile set windows-installation raw.apparmor="/home/matthew/Downloads/** rwk,"

Both the windows-required and windows-installation profiles can now be added to the win2019 virtual machine. To add both profiles use the following commands:

$ lxc profile add win2019 windows-required
 $ lxc profile add win2019 windows-installation

Now it is time to start the virtual machine using the console option and bring up the boot menu to select the Windows ISO file as the boot device. This part can be a little tricky as you will need to press the Esc key immediately as the instance starts, similar to how you would get into the CMOS settings of a computer. Use the following command to start the virtual machine with a console:

$ lxc start win2019 --console
(Press Esc key after running command)

Select Boot Manager from the menu and then UEFI QEMU DVD-ROM QM00001 to boot. You may see the Windows “Press any key to boot from CD…” appear or it may just be a blank screen, either way press Enter a few times to begin the installation process. It will appear as those the screen has frozen, we now need to exit the console so that we can open up a new VGA console. To exit, press both the Ctrl and a keys together, then after that press the q key (Ctrl+a-q) to release the console.

The next step is to setup a VGA console connection to the virtual machine. If the Remote Viewer (virt-viewer) application is installed it should automatically open after running the lxc console command. If the application doesn’t start a spice+unix URI will be returned that can be entered into the Remote Viewer application to connect. To open a VGA console use the following command:

$ lxc console win2019 --type=vga

Click through the first few setup prompts until you get to the “Where do you want to install Windows” screen. Click the Load driver option, expand CD Drive (E:) virtio-win-0.1.185 and select E:\vioscsi\2k19\amd64. You should now see a disk drive to install the operating system on. You can also choose to install the network driver now or after login. If you choose to install the driver now, repeat the Load driver process and select E:\NetKVM\2k19\amd64.

Continue the installation process. If the disk drive is offline, click the”Windows can’t be installed on this drive” link to turn it online. When the operating system reboots you will need to reconnect to the VGA console (The screen will appear frozen). It will more than likely reboot once or twice during the installation process.

After you have logged in, finish installing the remaining virtio drivers by opening up the E:\drive and running the virtio-win-gt-x64 install package. Be sure to configure a remote connection option such as RDP or Powershell

When finished setting Windows up, power off the virtual machine and remove the windows-installation profile as it is no longer needed. To remove the profile from the virtual machine use the following command:

$ lxc stop win2019
 $ lxc profile remove win2019 windows-installation

Start the win2019 instance up and test to verify that you can connect to it’s IP address either through RDP or Powershell.

$ lxc start win2019

If you plan to use this virtual machine to spawn additional virtual machines be sure to run the Windows sysprep tool and then you can either use LXD to publish the virtual machine or copy it to a new instance.

Posted on Leave a comment

Building your own Docker image for the LXD dashboard using source code

These instructions assume you already have docker installed on your computer. LXDWARE provides a Dockerfile in the source code of the LXD dashboard allowing you to easily build your own Docker image locally.

First download the source code. We will assume you already have git installed on your computer and will use git to download the source code. You can also download the source code directly from GitHub’s web interface. To download the source code use the following command:

$ git clone https://github.com/lxdware/lxd-dashboard.git

Now change your directory to be located inside the lxd-dashboard folder. Use the command:

 $ cd lxd-dashboard

To build the docker image use the following command (don’t forget the period at the end):

$ docker build -t lxdware/dashboard:latest .

You can now use the docker run command to setup and start the docker container:

$ docker run -d --name lxd-dashboard -p 80:80 -v ~/lxdware:/var/lxdware --restart=always lxdware/dashboard:latest
Posted on Leave a comment

Installing the LXD dashboard using the Docker image

These instructions assume you already have docker installed on your computer. The official LXD dashboard by LXDWARE image is available on Docker Hub and can be setup on your local computer with a single command.

The docker image listens on port 80 (HTTP) to display the web-based dashboard interface. If you have network access to the IP address of your docker container, you can use that to display the dashboard. However, in this set of instructions, port 80 on your computer will be used to forward traffic to port 80 on the container. The port that your host listens on can be changed.

As with all docker containers, persistent storage needs to be configured to allow data to remain throughout restarts of your container. The dashboard uses /var/lxdware for persistent data within the container. This can be bound to any directory location on your computer. For this set of installation instructions, ~/lxdware will be used as a bind mount location on your computer.

Version 2.x.x is a multi-user application and user accounts are now stored within the container’s database. To deploy version 2.x.x docker images of LXDWARE use the following command:

$ docker run -d --name lxd-dashboard -p 80:80 -v ~/lxdware:/var/lxdware --restart=always lxdware/dashboard:latest

With version 1.x.x images, the default username for the dashboard is admin. You can set your password by using the environmental variable when first running your container. If you do not set a variable, the default password is lxdware. It is recommended that you change the ADMIN_PASS value to a secure passphrase. For version 1.x.x images use the command:

$ docker run -d --name lxd-dashboard -p 80:80 -e ADMIN_PASS="lxdware" -v ~/lxdware:/var/lxdware --restart=always lxdware/dashboard:1.2.8

Posted on 13 Comments

Installing the LXD dashboard in an LXC container – v1.x.x

A newer version of this guide now exists for version 2.x.x here

This how-to guide will take you through the installation steps to run the LXD dashboard in an LXC container on your system. This guide will assume that your system already has LXD installed and configured.

Start by launching a new instance using the official Ubuntu 20.04 image. To launch the new instance and name it lxd-dashboard use the following command:

$ lxc launch ubuntu:20.04 lxd-dashboard

This will create a base container to use to install the LXD dashboard. Once the command finishes the container should be running. Now it is time to connect into the container and setup the software. Use the following command to obtain a bash shell connection to the instance, use the exit command at anytime to leave the shell:

$ lxc exec lxd-dashboard /bin/bash

The following commands will now be run inside the lxd-dashboard container. Verify that the terminal prompt reads root@lxd-dashboard:~# before installing any software. The LXD dashboard uses Nginx and PHP for the webserver platform and SQLite as a database to store remote lxd and simplestreams host connections. To install these packages use the following command:

$ apt update && apt install apache2-utils nginx php-fpm sqlite3 php-sqlite3 curl -y 

The web server connects through the REST API of remote LXD servers using curl. To allow the www-data user privileges to execute curl, run the following command:

$ echo "www-data ALL=(ALL) NOPASSWD: /usr/bin/curl" >> /etc/sudoers

Using wget, the source code for the LXD dashboard can be downloaded from the GitHub repository. For this guide the v1.2.8 release will be used. Check for newer versions on the GitHub page and replace the version number with the latest. To download and extract the source code use the following two commands:

$ wget https://github.com/lxdware/lxd-dashboard/archive/v1.2.8.tar.gz
 $ tar -xzf v1.2.8.tar.gz

A few web server files will need to moved into place for the web pages as well as the NGINX configuration. To copy these files use the following commands, making sure to change the version number to what was downloaded:

$ cp -a lxd-dashboard-1.2.8/default /etc/nginx/sites-available/
 $ cp -a lxd-dashboard-1.2.8/index.html /var/www/html/
 $ cp -a lxd-dashboard-1.2.8/admin /var/www/html/

The LXD dashboard uses an encrypted password for the admin user by echoing and piping the password to htpasswd. Be sure to use a secure password for the admin user by changing lxdware in the command below. The command can be run at anytime to change the admin password. To set the admin password use the following command:

$ echo lxdware | htpasswd -c -i /etc/nginx/.htpasswd admin

Secure connections made from the LXD dashboard to LXD host servers are made using certificates. A certificate will need to be generated and placed in the /var/lxdware/data/lxd directory to make it available to the web server. The LXD certificate is generated after an attempt to connect to a remote host. Connecting to localhost will fail, but also generate the needed certificate, so don’t be alarmed if you see Error: Get “https://localhost:8443”: Unable to connect to: localhost:8443 when running the command. Use the following commands to create the /var/lxdware/data/lxd/ directory and certificates and then copy the certificate information to the directory:

$ lxc remote add localhost
 $ mkdir -p /var/lxdware/data/lxd
 $ cp -a $HOME/snap/lxd/current/.config/lxc/client.crt /var/lxdware/data/lxd/client.crt
 $ cp -a $HOME/snap/lxd/current/.config/lxc/client.key /var/lxdware/data/lxd/client.key

Now it is time to setup the SQLite database used to store connection information for remote hosts as well as for simplestreams servers. The database will be located in the new directory /var/lxdware/data/sqlite/ and will contain two tables. To create the directory and setup the database tables use the following commands:

$ mkdir -p /var/lxdware/data/sqlite

 $ sqlite3 /var/lxdware/data/sqlite/lxdware.sqlite "CREATE TABLE IF NOT EXISTS lxd_hosts (id INTEGER PRIMARY KEY AUTOINCREMENT, host TEXT NOT NULL, port INTEGER NOT NULL, alias TEXT, protocol TEXT);"
 
 $ sqlite3 /var/lxdware/data/sqlite/lxdware.sqlite "CREATE TABLE IF NOT EXISTS lxd_simplestreams (id INTEGER PRIMARY KEY AUTOINCREMENT, host TEXT NOT NULL, alias TEXT, protocol TEXT);"
 
 $ sqlite3 /var/lxdware/data/sqlite/lxdware.sqlite "INSERT INTO lxd_simplestreams (host, alias, protocol) VALUES ('https://images.linuxcontainers.org', 'images', 'simplestreams');"
 
 $ sqlite3 /var/lxdware/data/sqlite/lxdware.sqlite "INSERT INTO lxd_simplestreams (host, alias, protocol) VALUES ('https://cloud-images.ubuntu.com/releases', 'ubuntu', 'simplestreams');"
 
 $ sqlite3 /var/lxdware/data/sqlite/lxdware.sqlite "INSERT INTO lxd_simplestreams (host, alias, protocol) VALUES ('https://cloud-images.ubuntu.com/daily', 'ubuntu-daily', 'simplestreams');"

Starting in version 1.2.6, local backups on instances can now be imported locally to the /var/lxdware/backups directory. You will need to create this directory.

$ mkdir /var/lxdware/backups

The /var/www/html/ directory, the /var/lxdware/data/sqlite/ directory, and the /var/lxdware/backups directory will all need to owned by the www-data user. To set the proper permissions run the following commands:

$ chown -R www-data:www-data /var/lxdware/data/sqlite
 $ chown -R www-data:www-data /var/lxdware/backups
 $ chown -R www-data:www-data /var/www/html

The NGINX web server will need to be restarted to apply the web server configuration changes made above. To restart the web server run the following command:

$ systemctl restart nginx

It would be good practice to clear the history of the bash commands so that the password used for the login credentials can not be retrieved through bash history. To clear the history run the following command:

$ history -c

Congratulations! The container is now setup with the LXD dashboard software. Exit from the bash terminal and return to your LXD host server by using the command:

$ exit

Open a web browser and access the LXD dashboard by entering in the IP address of the instance. Use the lxc list command to view a list of the containers and their IP addresses on your LXD server.

Optional Port Forward Configuration

Port forwarding can be used to make the lxd-dashboard instance accessible to others computers outside of the server. The lxd-dashboard listens on port 80 for web traffic. In this how-to guide the host’s port 80 will be forwarded to the instance’s port 80. For more information on port forwarding view the how-to guide Forwarding host ports to LXD instances.

To create a new profile named proxy-port-80 use the following command:

$ lxc profile create proxy-port-80

To configure the profile to forward the port 80 from the host server to port 80 on the instance, use the following command:

$ lxc profile device add proxy-port-80 hostport80 proxy connect="tcp:127.0.0.1:8080" listen="tcp:0.0.0.0:80"

To apply the newly created profile to the lxd-dashboard instance and begin forwarding port 80 traffic to your instance run the following command:

$ lxc profile add lxd-dashboard proxy-port-80

Open a web browser and access the LXD dashboard by entering in the IP address of the host server.